Sometimes, the smallest projects make the biggest impact. Look around any room, and you’ll start spotting little low-budget makeover opportunities—simple things like refreshing a planter, switching up the handles on a cabinet, or adding a colorful throw to your sofa. These aren’t massive renovations, but they’re game-changers for your space. It’s about finding those small, overlooked details and giving them a new life. A splash of paint, a little rearranging, or just the right accent piece can totally transform a room, making it feel more “you” without breaking the bank.

There’s a lot to do in the new apartment, but for now, I’m focusing on the porch. I’m not sure why I started with the exterior—maybe because it feels simpler. It’s a small, rented space with no soil for planting, so I probably figured that adding some color and greenery would really make a difference. I can already see the palette: soft white, hints of gold, a dusty light pink, and a few touches of black.
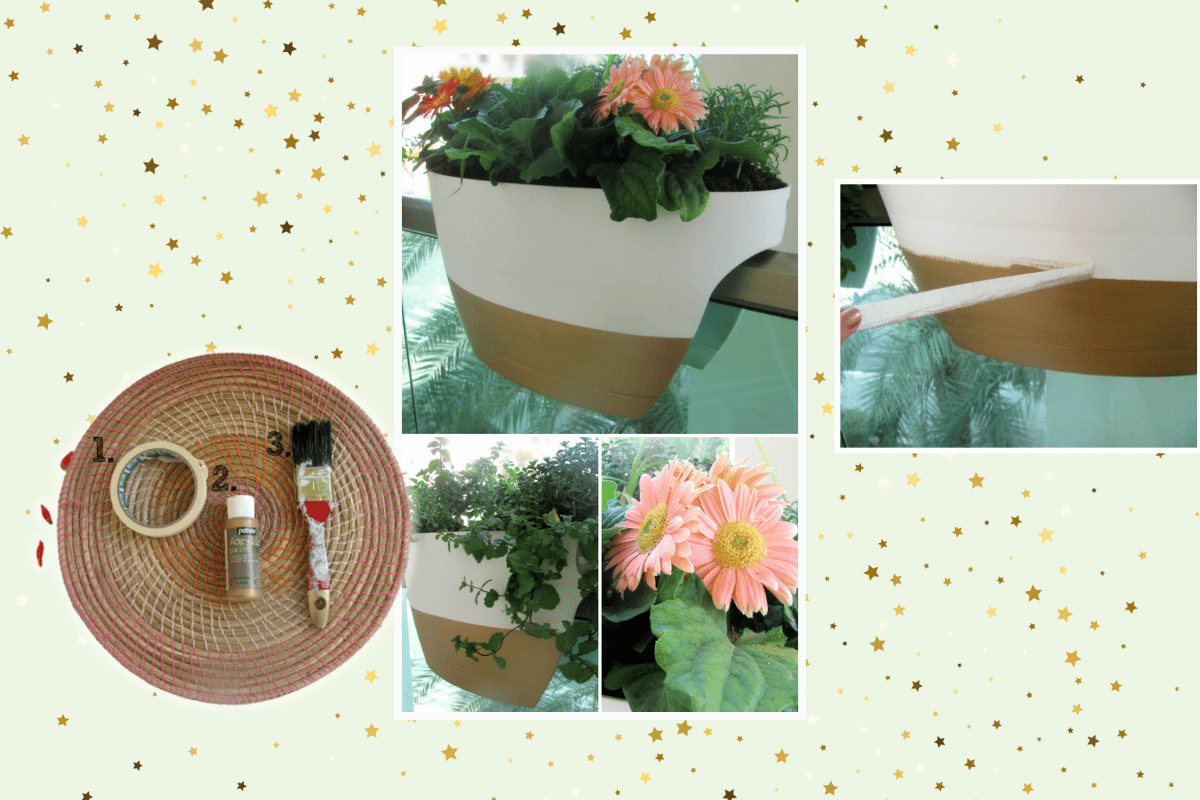
Before diving into the entire porch project, I started with a quick and easy DIY to bring life to some basic white plastic planters. The goal was to make them look like they belonged here, rather than as store-bought pieces.
Adding a touch of color to plastic planters: what you’ll need
This project is as simple as it gets! Here’s what you’ll need:
- Gold (or any color) acrylic paint
- A medium-sized paintbrush
- Paper tape

Adding a touch of color to plastic planters: Steps
- First, use Sellotape (I used a paper tape which is easier to remove) to mark off the top edge or create stripes—this will guide the paint.
- Apply the paint to the taped-off area with your brush. Two coats usually give the best coverage. Wait about 20 minutes between coats, and after the final coat, let it dry for an additional 20 minutes.
- Once it’s dry, carefully peel off the tape, and you’re done!

With just a little paint, these planters went from plain to personalized, adding the perfect touch of color to the porch.


